Confessions of a Stay-At-Home Mom: How-To
Showing posts with label How-To. Show all posts

January 19, 2014

Tooth Fairy Pillow Tutorial


We are suddenly in the age of dealing with loose teeth.

The whole thing makes my stomach flip flop.

As a child, my dad was the ultimate at-home dentist. The moment we even breathed the whisper of a loose tooth, he'd stick his entire fist into our mouths and yank that sucker out (whether it was ready to go or not, mind you). The only redeeming factor was that later that evening, the Tooth Fairy would arrive and bring the sweet salve of yanked teeth wounds: money.

Needless to say, I'm still a little scarred from these experiences.

So when Chica started complaining that her tooth was loose, I got nauseous. I remembered the pulling, the pain, the tears. And really, just watching her tongue wiggle that little front tooth gives me the heebie-jeebies. I'm thinking we'll need to find alternative measures if that thing doesn't come out on it's own.

On a positive note, when I was little, my mom had a special pillow for when we lost our teeth. It was small, maybe 9-inches by 9-inches, and swathed in yellow and white gingham with lace around the edges. In the middle of the pillow was a small pocket. It was here that we would put our lost teeth in anticipation of the Tooth Fairy's arrival. I loved that little pillow and the significance it held.

Since we'll be having to debut the Tooth Fairy in the not-so-distant future, I thought I'd whip up my own homemade version of the Tooth Fairy Pillow. Now, disclaimer here: I am not skilled in the craft realm. So if you saw the title of this post and thought I'd somehow morphed into one of those crafty design bloggers, you've been duped. I can't lay out the perfect pattern for a pillow, complete with beautiful pictures detailing my fine work.

What I can give you, though, is a rudimentary pillow that even a squirrel could manage to make. The hems won't be pretty. And it won't win you any Home Economics awards. But it is easy. And it's something you can make. Which means it will mean the world to your kids.

Seriously: if I can make this, you can make this.


Here's what you'll need:


First, my * note: You'll need VERY little fabric for this project. You need to be able to make 2 9-inch squares and 1 1-1/2 inch square. So you'll need less than a yard of each. The problem is most fabric are sold by the yard. So see if your local fabric store can give you 1/2 a yard. OR, search the scrap, remnant or quilting square fabrics. You will most likely find what you'll need here and spend less money.

Second: You can choose to hand sew or machine sew this project. If you are slow and careful, this can easily be done by hand. I happen to have a sewing machine (gasp! I know!), so I used that until the end, after I had stuffed the pillow and hand sewed the hole.

Now how to do it:

1) Pick which fabric you want to use as the main pillow and cut 2 9-inch squares. Then, cut a 1-1/2 inch square from the other fabric. This piece will be your tooth pocket.


My fabric


Chevron = Pillow, Pink = Tooth Pocket

2)  Next, I pinned my small pocket fabric to one of the panels of my large pillow fabric. (Note: Ignore the small white thread on the pink fabric. The small square is very difficult to hem, so I decided to forgo this part. If you are crafty like ice is cold, go for it. Instead, I made my pillow "shabby chic" and left it kind of rugged.) 


This was the first attempt at hemming, which I trashed.
So ignore the white thread on the pink square.


3) Sew (either by hand or machine) 3 sides of the pocket onto the pillow panel, leaving the top side unsewn and open, making a "U" shape (see picture below).


It's kind of reminiscent of a watermelon, no?


4) Pin the 2 pillow panels right side together (meaning, the "outside" good part is on the inside for now and you are looking at the "inside" blah part).


All pinned and ready to go. Note that it's the "bad" side you see.


5) Sew (either by hand or machine) around the entire edge of the pinned fabric, leaving a 1-2 inch opening so you can turn the pillow right-side out and stuff it. I sewed the hem about 1/4 from the edge the whole way around.


6) Through the opening, turn the pillow right side out. Yay!


I pushed the fabric through the hole to turn it right-side out.


Eh. Imperfect, but sewn! Now onto the filling.


7) Stuff the pillow with the Poly-Fil as little or as much as you'd like through the hole you left open (stop laughing and get your mind out of the gutter).


Stuff it. Stuff it good.


8) By hand, sew up the hole. I didn't do anything fancy - just a whip stitch - but anything will do. Remember - it doesn't need to look amazing or anything.


The size of the opening I needed to sew closed.


This is the needle I used, for reference.

All sewed up! Again, not pretty, but it'll do.


Enjoy!


Finished product!


See, it's not so difficult, right? And it's almost kind of cute...


What are some of your favorite simple sewing projects?


If you make this tooth fairy pillow, PLEASE contact me and send a pic. I'd love to see how this turns out for you!


~~~~~


June 24, 2013

Homemade Peanut Butter {How-To}


Homemade nut butter is one of those secretly awesome and easy things to make yourself, but few people realize it! If you are a parent with kiddos, peanut butter and jelly sandwiches are a standard fare in your house. If your child has peanut allergies, you may have ventured into the realm of almond butter (which is actually my favorite nut butter), cashew butter or pistachio butter. One of the biggest qualms with store-bought peanut butter is the add-ins: preservatives, oil (often hydrogenated), sugar and salt. 

Since it's Motivation Monday, I found it fitting to share this How-To. I've been motivated more recently to MAKE more things rather than BUY them: cleaners, crafts and food.  I've dedicated an entire board on Pinterest to BAKE it don't BUY it. Why buy frozen pizza when you can make a fresh pizza at home, with ingredients you can control? Get rid of the MSG-laden Ranch Dressing mix and make your own Homemade Ranch Mix! Even Cheez-It's and York Peppermint Patties can be created at home, often slightly more healthy and at a more economic cost.

Well, guess what.

YOU can make nut butter.

At home.

All by yourself.

YOU can control what goes in. 

Also?

It's super simple.

The recipe?

ONE INGREDIENT.

Can you guess?

Yep. Nuts.

And ZOMG. It is so. dang. tasty.

It's literally as simple as throwing nuts in a food processor. It is best to use roasted nuts, which gives a better depth of flavor than raw. And I opt for unsalted, so I can control the amount of sodium in the butter. You can add salt later - but I have never had to add  The key, though, is processing the nuts LONG enough. THhis is where many who may have attempted feel that they "failed" - because the texture was still too tough, course or pasty. But if you process is LONG enough, if you have patience, the nuts magically break down and release their natural oils (forget that hydrogenated crap!).  

I've put the instructions into recipe format, as several people have asked for the "recipe."  But like I said - it's just your nut of choice (get your mind out of the gutter) all processed up. To better explain, I whipped up a quick video to actually SHOW you how to do it. It's not the best video I've ever done, but it gives you a visual.

Here goes:


  • 1 lb of ROASTED, UNSALTED nuts (peanuts, almonds, cashews, pistachios - your choice).
  • OPTIONAL: Salt (I don't add this, but you can if you feel it needs it)
  • OPTIONAL: Add-ins (cinnamon, honey, chocolate, etc)


Place nuts into your food processor. Begin to process on your low or medium setting. The nuts will break down in stages (see the video below). First, the nuts will become chopped. Then finely chopped. Then into the equivalent of almond flour. During this time, you will notice the mixture will take on a sheen, as though it is wet. 

Once it is wet, it will start to glob together, often creating a ball that circles the food processor. KEEP GOING. The ball will break down, again in stages. The ball will first break down and start to splay against the walls of your machine. Many stop here, but the oils are not fully released yet. Wait until all "globs" have broken down, and the mixture is easily thrown to the sides of the food processor. Once it gets to this point, I will process another 1-2 minutes, until it is viscous. When you stop the processor, lift up the container. If you tilt it side-to-side, the nut butter should flow like a thick liquid from one side to another. 

This is when you know it is ready!

But be sure to taste-test. All good cooks do ;)

If you are like me a need a visual reference, here is the video (apologies for the poor quality - my food processor is VERY loud and I couldn't get a "cameraman" [::cough cough HUBBY cough cough:: to help me that day!):


I'd love to hear if you try making your own nut butter and how it turns out for you! And if you have any comments, don't hesitate to leave a message. I will answer it as best as I can.


~~~~~


October 17, 2012

Construction Paper Chain Link Calendar {Tutorial}


Autumn brings the hopeful anticipation of many fun events and holidays. Every day when Chica wakes up, she bounds (LOUDLY) down the (2 SETS) of stairs and eagerly asks, 

"Is it Halloween today?"

"Is it Thanksgiving today?"

"Is Austin [Chica's cousin] coming today?"

"Is it CHRISTMAS YET?"

It breaks my heart to have to tell her, day after day, no, today is not that day.  I've tried looking at a real calendar with her, but all those boxes and numbers seem to go over her head. After today's bombardment of calendar questions, I was struck with inspiration.

I remembered back to elementary school when we would cut strips of construction paper, form loops, and interlock them into chains. Often, we used this as a measurement of time to a certain event (ie: Halloween). Each day, one student got to rip the bottom link off, indicating it was one day closer to The Big Day.

I thought this project would be perfect for Chica. Seeing the chains would give her a visual of time, and cutting the bottom link each day would give her the comfort that time was passing. Over time, we can watch the chains shrink as certain events get closer.  The project needed minimal supplies and many of the steps were Preschooler Friendly.


With such an easy (and fun!) project on hand, I couldn't believe I had forgotten about "Chain Link Calendars."  Since some of you may have as well, I thought I'd post a quick tutorial on how to put one together. It's the perfect time of year to create them with your kids. Today, Chica and I made two: Halloween and Thanksgiving.  Since the Christmas one would be SO LONG, we'll wait until November to put that one together.

Here you go!


Supplies:


  • Several pieces of construction paper (colors of your choosing)
  • Scissors
  • Tape or Glue


Step 1:  

Figure out how many strips (ie: days) you need for your Chain Link Calendar. Cut 1-inch wide/6-8 inches long strips from your construction paper.

This was for our Thanksgiving Calendar 


Step 2: 

Glue one end of the paper strip.


Step 3: 

Bring the ends together to make a loop. Take the next strip and repeat Step 1. Weave the strips through the completed link and close to make a loop.

Getting my weave on

Make sure the links are roughly the same size.

Press tightly to seal the link


Step 4: 

Add more links until you have the right amount of "days" for your Calendar. Watch it grow!

Halfway done!

Chica was my strip hander-over.

(Optional) Step 5: 

Make special markers for the Events. We have special visitors coming in for Thanksgiving, so I made a special marker for when they arrive, and then for Thanksgiving, which is 2 days later.


Step 6:

Find a place to hang your Chain Link Calendar for display. We chose the dining room. The one on the right is for Thanksgiving, the one on the left for Halloween. 

Can you tell Chica is SO proud and excited? And all,
"Mom, stop taking pictures."

It kind of acts as a festive decoration as well, don't you think?


Step 7:

Each day, cut the bottom link off of your respective calendars. The Chains will grow shorter and you can get excited for the holidays and events to come!


~~~~~

This was a great project for Chica. I think it will help her understand time (days, weeks, months, etc) better, and while we put the links together, we worked on patterns. As you can see in the Thanksgiving Calendar, there were 4 colors, and I used the opportunity to quiz Chica on what color came next. She caught on quick, and corrected me when I was about to put the wrong color on next!  

Make sure adults do the cutting, unless you have child-safe scissors. If you aren't jazzed about using glue, I recommend tape. That was my original plan, but there was a bit of a meltdown at Walmart, and we needed to make a quick exit!

I'd love to see YOUR Chain Link Calendars! So let me know how this project works for you, and share your pictures on the Confessions of a Stay-at-Home Mom Facebook Page!

August 7, 2012

Blanching Tomatoes {How To}

3 <----LEAVE A COMMENT HERE


I've been making my own Tomato Sauce for years.  Coming from an Italian family, it'd be a crime to pick up a jar of prepared sauce from the grocery store and adorn your pasta with it. So as to avoid any Godfather-esque calamities, I've always made my sauce from scratch.

Well, sort of.

Up until recently, I've used canned tomatoes. Partially because this is how my mom always did it, and my mom taught me to make sauce. Also, I've never had access to super fresh tomatoes that made it worth working with the non-canned variety. Mostly, if I am honest, I was intimidated by whatever procedure I had to perform to ready the tomatoes for sauce.

So I always resorted to cans.

I went to the West Chester Grower's Market last weekend, and the bounty of beautiful and plump tomatoes was too hard to resist. I decided then and there that I was going to buy a bunch and make my own sauce from scratch. From FOR REAL scratch.

After hauling my Market Stash home, I took to the interwebs to learn how to prepare tomatoes for sauce. I posed the question on Facebook, and many people said they just blend the tomatoes, skins and all, in a food processor then run it through a mill so the skin was well incorporated. I don't have a mill, and I wanted to not deal with skins. So my next option was blanching.

Blanching seemed difficult, but it was actually a quick and easy process. Since many of you might be wondering how to perform this step in the journey to make your own sauce, I documented each step.  Just follow the instructions below, and you'll have (non-canned) whole peeled tomatoes in no time!


Step 1:  Fill a large stock pot with water and bring it to a boil over a high heat. Nearby, fill a large pot or bowl with ice water.


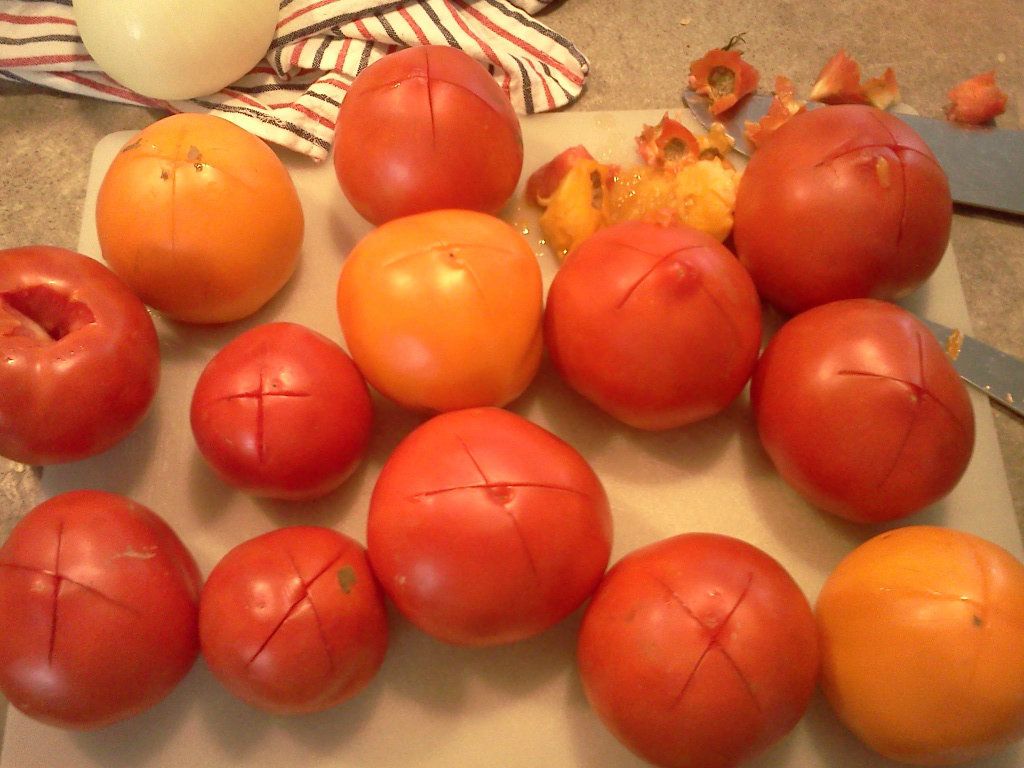
Step 2: Dig out the top portion of the stem of each tomato and lightly score the bottom of the tomato with a knife.


De-Stemmed!
Score!


Step 3: In small batch, stick several tomatoes into the boiling water for 20-60 seconds.

Boiling Tomatoes

Step 4: When they are ready to be removed, take the tomatoes from the boiling water and immediately place them in the ice water.


Ice Ice, baby.

Step 5: When cool to the touch (it should be less than a minute), gently peel the skin away from the meat of the tomato. It should come off easily!


The skins!


Step 6: Repeat until all of your tomatoes are skinned!

Fresh, peeled whole tomatoes!

Whole Peeled Tomatoes can be used for a variety of recipes, including sauces, salsas, casseroles and more. Using fresh-picked tomatoes from your garden or local farmer's market really adds a great depth of flavor! This process also works for other fruits, such as peaches (go make some pie!)

Will you be trying this blanching process anytime soon? What will you be using the tomatoes for?


May 22, 2012

{How To} Dixie Cup Popsicles

5 <----LEAVE A COMMENT HERE


Nothing says "Summer" like a nice, cold popsicle.  Growing up, I loved the long days with lingering twilights.  Those nights when the sun seemed to slowly set, my sisters and I would dig into the thin cardboard box of orange, red and purple ice pops.  It was heaven.


Now I realize that it's easy to make popsicles at home. This saves money, allows you control over the ingredients, and gives you a chance to try really creative flavor combinations.


Last summer, I was excited to make homemade popsicles. I went out to Walmart and got a popsicle mold kit. The white plastic had 6 popsicle shapes complete with 6 plastic sticks.  On our way to check out, we got some sugar-free pudding mix and skim milk to create our homemade pudding pops. Little Chica and were ready to have some Popsicle Making Fun!


When we got home, we whipped up the pudding, poured it in the mold and popped it in the freezer. The next day we excitedly retrieved the frozen pops, but when we attempted to release the popsicles from the mold, the plastic sticks snapped off!  No sticks render popsicles all but inedible.


No popsicles. Total disappointment.

March 7, 2012

How to Make Homemade Meatballs: Video Tutorial

3 <----LEAVE A COMMENT HERE


Here is my next tutorial video!  Not as smooth as the How To Roast Red Peppers video, but learning as I go.  What I am working on for the next video: knowing what I want to say, and making the overall video shorter (sorry if this one is too lengthy).  Also - totally said something cheesy at the end of the video, but couldn't cut it out without making it choppy (we did try to cover it up with music though). So...ignore it.

February 28, 2012

How To Roast Red Peppers: Video Tutorial

4 <----LEAVE A COMMENT HERE
If you are in love with Roasted Red Peppers like I am, but have been intimidated by the idea of trying to make them at home, LOOK NO FURTHER.


Today I bring you How To Roast Red Peppers (the first Confessions of a Stay-at-Home Mom Video Tutorial). 


**Pay no mind to the verbal flubs, random weird faces, general awkwardness or the intermittent cutting off of my head (but many thanks to Hubby for his cameraman/video editing skills - MWAH!)**


I hope this tutorial inspires you all to run out, buy some red peppers and get your ROAST ON. Because, seriously?  Roasted Red Peppers are the bees knees.  I make Roasted Red Pepper with Goat Cheese Sandwiches on a weekly, if not daily, basis. They are also my fave pizza topping and make a killer companion for asparagus. 


And now for your viewing (and learning) pleasure...


More videos/vlogs/tutorials to come!


What cooking/kitchen how-to's would you be interested in watching?

Lemme know!


August 1, 2011

Mashed Potatoes {Tutorial}

1 <----LEAVE A COMMENT HERE


While a heaping bowl of mashed potatoes might not qualify as a complete meal (although, I have been known to devour it as such in the past), it does make a great complimentary side dish. And really, what is an entree without it's perfect side dish?


I mean, it's like Batman without Robin.


Now, for some of you, giving a "how-to" on making mashed potatoes may seem like an insult.  You've probably been making perfect, creamy, buttery spuds for years, just like your mommy and grand mommy used to.


Me? Not so much.


In all honesty, I used to really STINK at making Mashed Potatoes. Like, until the past year.  Sure, like most people, I grew up eating mashed potatoes that my mom made.  The term "mashed potato" being used quite loosely here. Words like "glue" or "cement" might make a better description.  Now, I love my mom, and she makes many great meals.  But, it seems she has passed the recessive "crappy mashed potato" gene to me.


What can I say? It's a curse.


But, after many years of research, trial, error and plenty of bad batches of mashers, I think I've overcome my spud destiny.  I've finally settled into a good, consistent technique that turns out yummy mashed potatoes every time.  


Let me lay it out for you, step by step:


Start With Good Ingredients


Potatoes

I never knew that certain potatoes make better mashed potatoes.  Some people just pick potatoes at random.  My one friend swears by Yukon Golds. For a while, I was a tried and true Russet potato girl.  But I now will only use Little Red Potatoes (also known as "Mashers" - should have been my first clue).  I don't know if they have a different proportion of starch or something, but they, hands down, turn out creamier potatoes. For 4-6 servings, I use roughly 6-8 avergage-sized red potatoes. For a larger dinner party, double it.


Butter 

I know healthy is all the rage now a days, and I am all about being healthy.  But mashed potatoes need butter.  That's all there is to it.  You can substitute margarine or Smart Balance or omit it all together, but you will absolutely lose flavor and texture.  For 4-6 servings, as stated above, I use at least 3-4 TBS of butter.  If you want richer potatoes, use more. I'm not here to judge.


Milk 

This helps add to the creaminess.  I use my good judgement, but for 4-6 servings, I splash about 1/4 cup of fat-free skim milk into my potatoes.  If you want a richer batch, use whole milk, half-n-half or heavy cream. Too much milk makes your potatoes too thin, so if you are worried about how it will turn out, put the milk in a measuring cup and slowly pour it in until the desired texture.


Salt

Salt brings out flavor, but YOU DO NOT NEED MUCH.  Most times, I don't add salt to the main batch at all, and I just let people season to their liking.  But if you would rather season the main batch yourself, use a pinch. Literally, just a pinch.


Those 4 ingredients are the only ones I use to make my mashed potatoes, and they turn out perfect every time.  If you like to spice things up a bit, here are a few "Steph Approved" add-ins:


Additional Add-ins  

Garlic (powder or minced), sour cream, chives, black pepper, goat cheese, cheddar cheese.


~


Cook The Potatoes Correctly


I can't tell you how easy it is to overcook or undercook a pot of potatoes, ruining any chance you have at a decent batch of mashed potatoes.  Here are the 4 steps you need to take for good mashed potatoes:


Peel 

Completely peel all the potatoes, washing off any bits of dirt you find.


Dice

Don't dice to small.  I made this mistake a lot before I knew better. I cut the potatoes into 1 inch cubes. No smaller, no bigger.


Boil  

Follow this order carefully ~ Place the potatoes into your pot, then fill with water enough to cover the potatoes..  Place on high heat.  Once the water begins to boil, set a timer and boil for 15 minutes.


Drain 

Drain in a colander over the sink.


~

Use The Right Technique


There are tons of philosophies on how to actually mash the potatoes.  Some say that a potato ricer is the best kitchen tool to use. I do not have one of these. Others swear by using a hand-held potato masher.  I do have one of these, but I personally do not like the texture it creates. If you like a courser texture, then please use a hand-held masher.  

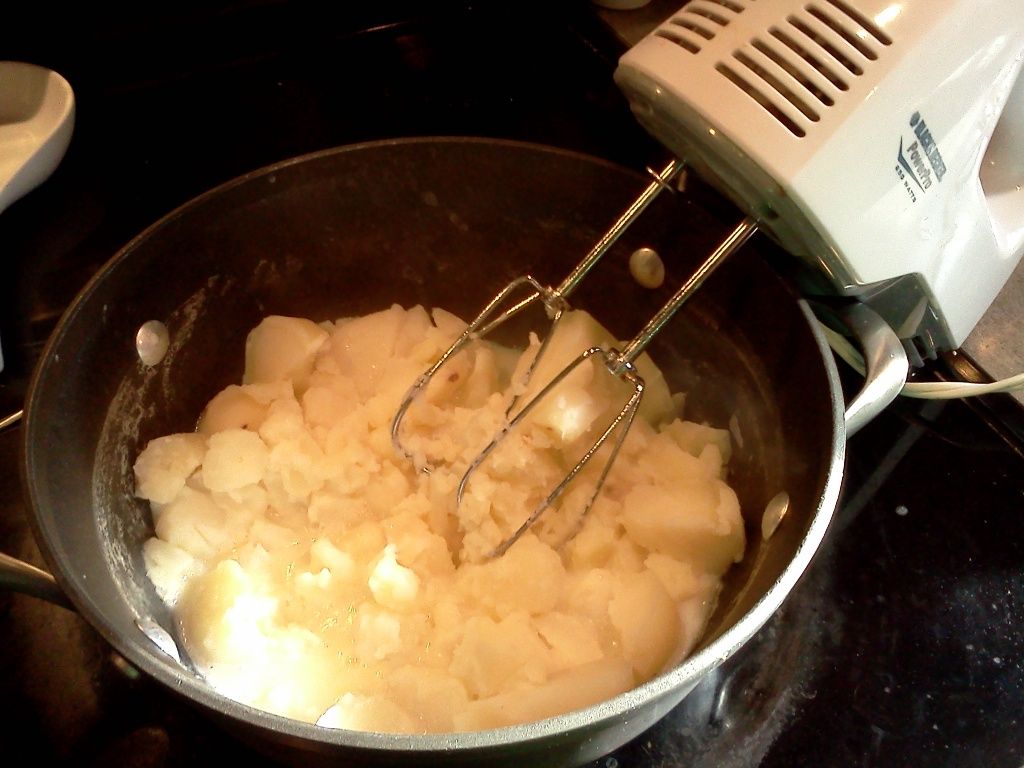
I prefer using a hand mixer.

This is controversial, as many cooks will say that hand mixers over-work the potatoes, releasing too much starch, and making for a bad texture.  I have found it makes for a smooth and creamy consistency.  Try each tool out and see what works best for you. 


Here is the technique I use:


Pot 

Place the potatoes back into the cooking pot, but off the hot burner


Butter

Add the butter so it begins to melt.


Mash


I take the hand mixer and semi-mash by hand the big chunks.


Mix 

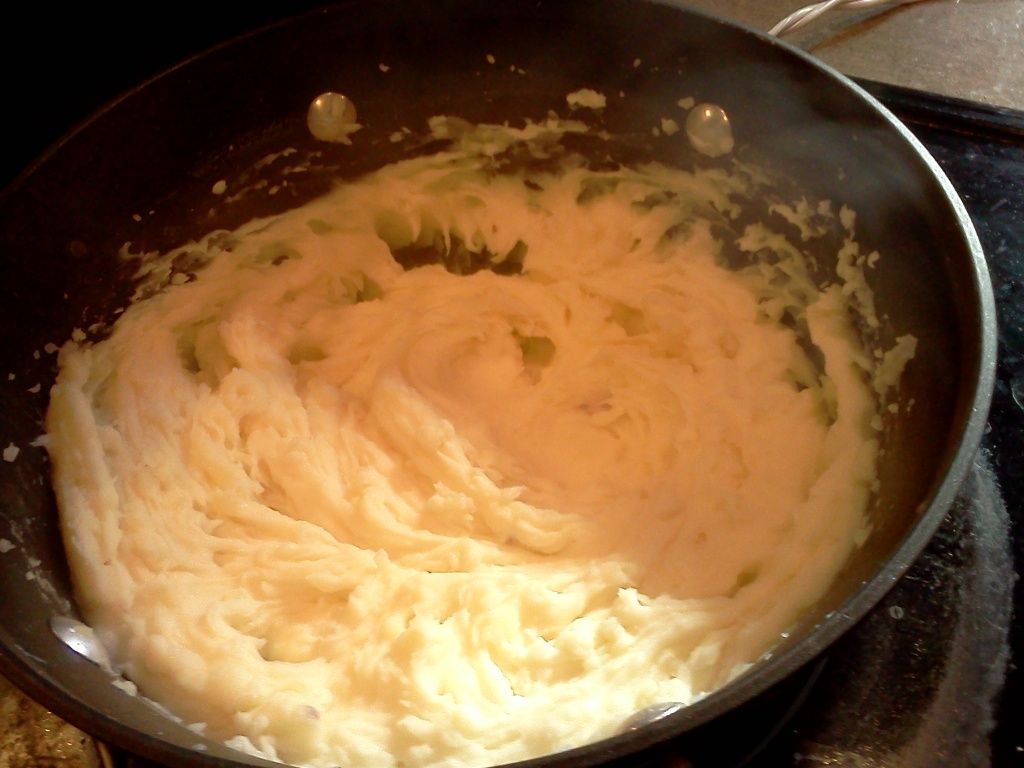
Once the mixture is semi-mashed, I turn the mixer on and and beat the potatoes until they are smooth


Add 

Add the milk and mix it in. If you are adding salt or any other additional add-ins, add it now.


Taste and Adjust

Before serving the potatoes, try a small spoonful. Make sure the texture is to your liking.  Make sure the levels of ingredients are correct (too bland? Add 1 TBS butter and a dash of salt.  Too salty or buttery?  Add a splash of milk to even it out).


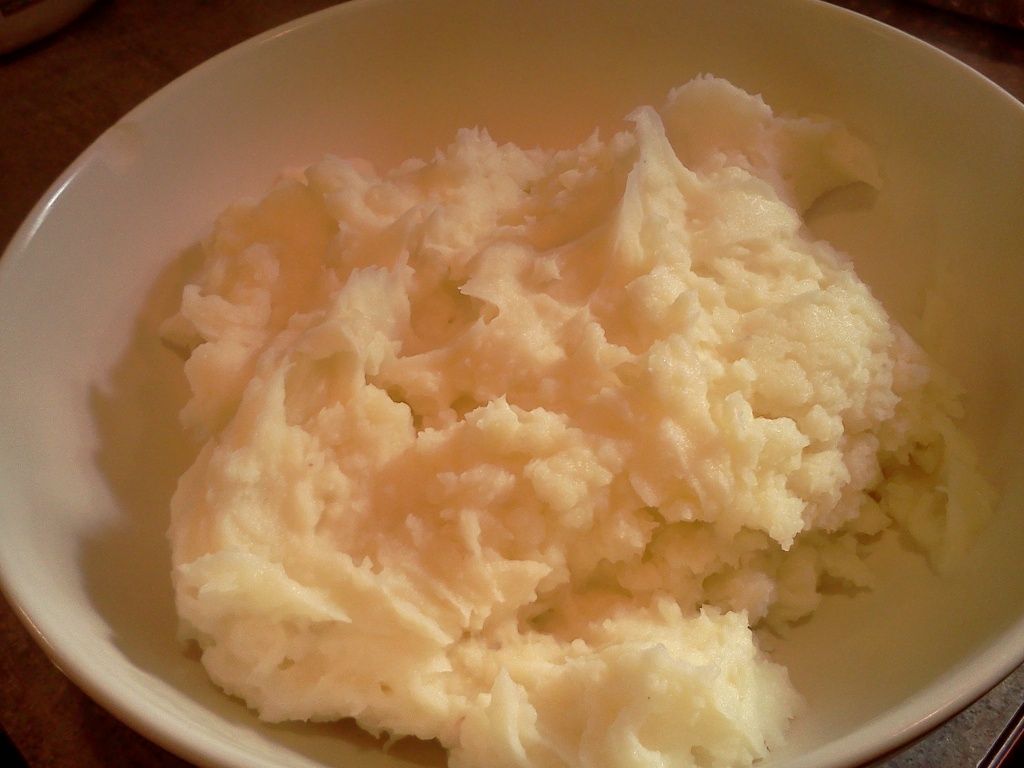
There you have it!  Perfect mashed potatoes every time!


I'd love to hear your method for mashers.  What add-ins do you use?  What success have you found with techniques or ingredients? Please feel free to leave a comment and share your wisdom.


~~~~~


Mashed Potatoes


  • 6-8 Red Potatoes, peeled and diced
  • 1/2 stick (4 TBS) Butter
  • 1/4 cup of Milk
  • Pinch of Salt
  • (Add in's additional)


1) Place potatoes in pot.  Fill with water to cover 1 inch above the potatoes.  Heat on high. Once water begins to boil, set timer for 15 minutes. After 15 minutes, drain potatoes in a colander over the sink.  Return potatoes to cooking pot, but take off of heat.


2) Add butter so it has a chance to melt.  


3) Hand mash the large chunks of potato into smaller chunks manually with hand mixer. Once the potatoes are chunked smaller, turn on hand mixer and beat until creamy


4) Add milk, salt (if desired) and add ins (if desired).


5) Taste and adjust, then serve and enjoy!

Related Posts Plugin for WordPress, Blogger...
Google